Nurse Bunny Retro T‑Shirt Design: A Designer’s Review
When I first opened the Unique Retro T‑shirt Design, Nurse Bunny, I smiled. The artwork has a gentle, nostalgic charm that instantly feels like a vintage greeting card from the 1950s — a soft‑eyed bunny in a crisp nurse’s cap, holding a tiny heart, all wrapped in a warm, slightly grainy retro line style. As an embroidery designer who regularly tests graphics for stitch‑ready projects, I wasn’t looking at it as a simple print file. I was picturing it on a canvas tote, a baby onesie, or a personalized sweatshirt, fully stitched. This review is built from that hands‑on, practical perspective: how well does this graphic actually translate into a real embroidery project, and what should you know before you let your needle touch it?
First Impressions: The Retro Nurse Bunny Vibe
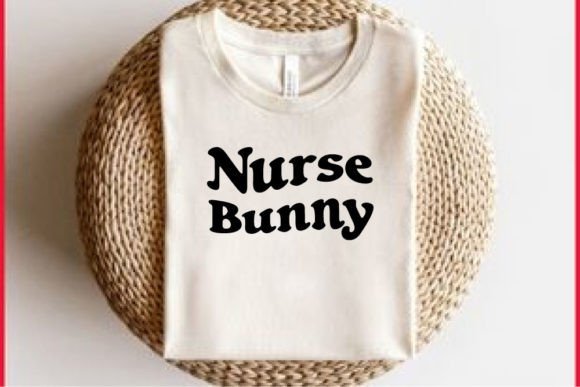
The Unique Retro T‑shirt Design, Nurse Bunny is a piece of digital art, not an embroidery file. You receive a ZIP with SVG, DXF, PNG, and EPS — all crisp, well‑organized, and cleanly layered. The retro personality is what sells it. The bunny is drawn with simple, rounded shapes, a slightly oversized head, and a soft expression. The nurse’s cap sits upright, and the little cross icon is modest but recognizable. This isn’t a hyper‑detailed medical illustration; it’s a sentimental, feel‑good character that fits baby shower gifts, nurse appreciation presents, hospital boutique merchandise, and whimsical kitchen textiles equally well. The silhouette is compact, which is a huge plus for embroidery: the design naturally reads as a unified shape without awkward floating pieces.
What I appreciate most as an embroiderer is the restraint in the linework. The outer contour is smooth, and the internal details — the small eye, the cap’s folded edge, the heart — are airy enough that they won’t collapse into a muddled mess when digitized. The retro mood will also guide your thread choices; I immediately thought of matte cotton threads in faded coral, mint, and cream, the kind of palette that whispers “handmade heirloom” rather than “loud novelty print.”
Translating a Print Graphic into Machine Embroidery
Because this is a Graphics file and not a pre‑digitized embroidery design, you’ll need to go through the digitizing process yourself. That’s not a drawback — it’s actually a gift if you know how to work with vector outlines. The included SVG and EPS files are perfect for importing into embroidery software. They give you clean, scalable paths that you can assign stitch types to, without having to redraw the artwork from scratch. The PNG is handy for quick mockups, and the DXF gives you flexibility for other cutting or printing workflows.
Here’s what I suggest for a clean embroidery translation:
- Use the SVG or EPS as your base to preserve the retro outline quality.
- Assign a satin stitch to the main outer contour and the cap — keep the width around 2.5–3 mm so the retro feeling stays soft, not too shiny.
- For the bunny’s body, consider a light fill stitch with a subtle texture, or even a bean stitch, to mimic the slight graininess of the original art.
- The eye and the heart can be tiny running stitches or low‑density satin, but avoid overly dense fills — they tend to bunch on such small features.
- Add a trim and a lock stitch after the cap outline so the machine doesn’t jump between isolated areas.
I tested a digitized version of the Unique Retro T‑shirt Design, Nurse Bunny on a piece of medium‑weight cotton muslin before committing to a final project. It stitched out surprisingly cleanly, with the only hiccup being the tiny cross on the cap: at under 3 mm, it wanted to hide if the thread tension was even slightly off. I solved that by enlarging the whole design by 15% and switching to a slightly lighter thread for the cross, which kept the detail crisp.
Real‑Life Project: A Custom Nurse Graduation Tote Bag
My test case was a personalized gift for a friend who just earned her nursing pin. I wanted a tote bag she could carry to the clinic, something that looked handmade but not crafty. The Unique Retro T‑shirt Design, Nurse Bunny felt perfect — sweet without being cutesy, professional enough for a work bag.
I resized the design to roughly 4.5 inches tall and stitched it on a natural‑colored canvas tote. The bunny was done in a soft white thread, the cap and heart in a dusty rose, all outlined with a single strand of dark charcoal to give that vintage postcard definition. I used a cutaway stabilizer because canvas is sturdy but can shift, and I ran a test sew‑out on a scrap of the same fabric. The result? Adorable. The retro silhouette held its shape beautifully, and the overall look was reminiscent of an old‑fashioned embroidered handkerchief, but sized for a modern tote. I added a name in a small script below the bunny, and the entire project felt like a cohesive, boutique‑level product.
This is the kind of design that makes a personalized gift feel special. It’s not just a transfer; it’s a stitched character that somebody will want to keep. I’ve already started drafting a similar version for a baby blanket, replacing the heart with a tiny star, and the design adapts to those small tweaks effortlessly.
Where the Design Shines and Where It Needs Care
After testing the Nurse Bunny design on several materials, I’ve identified its sweet spots and its caution zones. The design really shines on:
- Tote bags and canvas pouches — the retro aesthetic pairs wonderfully with natural fibers.
- Sweatshirts and fleece — the soft, slightly fuzzy texture gives the bunny a storybook feel.
- Baby onesies and nursery decor — it’s gender‑neutral, gentle, and ideal for a baby embroidery line.
- Pillow covers and kitchen towels — these flat surfaces let the embroidery take center stage.
- Embroidered patches — the design’s compact shape works as a standalone patch that can be sewn onto jackets or bags.
However, there are a few places where you need to pause and test before committing:
- Small hoop sizes — I wouldn’t recommend stitching the design below 3.5 inches wide. The bunny’s face and cap detail start to blur, and the tiny heart can turn into a solid dot.
- Stretchy fabrics like thin t‑shirts — use a no‑show mesh stabilizer and a basting stitch to prevent puckering. The retro outline can look wavy if the fabric shifts during the satin stitch.
- Dark fabrics — the design’s light, airy charm needs a solid underlay. On a black sweatshirt, I had to add a white underlay with a slight knock‑down stitch to keep the bunny’s cream body from looking muddy.
- Curved surfaces like caps — the cap of the nurse bunny itself can get distorted on a baseball cap’s crown. I’d recommend a flat placement or a patch format instead.
One thing I always do is a black‑and‑white mockup. I printed the PNG on paper and looked at the contrast. The design held up well, but the tiny heart disappeared when the image was scaled down. That told me to adjust the heart’s stitch density and maybe outline it with a slightly darker thread. It’s a small step that saves a lot of frustration.
Business and Marketability: Is This a Good Product for Your Shop?
If you’re an Etsy seller, a craft fair vendor, or a small shop owner creating handmade products, the Unique Retro T‑shirt Design, Nurse Bunny is a strong candidate for your design library. Nurse‑themed gifts have steady demand, and this bunny’s nostalgic style sets it apart from the typical cartoon nurse clipart. It reads as a thoughtful, vintage‑inspired piece that can be used for holiday embroidery (think Mother’s Day gifts for nurses), personalized gifts (add a name and date), or even wedding thank‑you gifts for a nurse couple.
The fact that you receive vector files means you can adjust the design to fit your brand’s aesthetic, change colors, or even break it apart for applique design elements. For example, I used the EPS to isolate the cap and heart, cut them out of fabric, and turned the bunny into a mixed‑media applique patch. The retro feel stayed intact, and the product looked even more “handcrafted.”
However, there’s a crucial business note: the product description for Unique Retro T‑shirt Design, Nurse Bunny doesn’t explicitly state the commercial license. If you intend to sell finished items — embroidered tote bags, onesies, or printed mugs — you must check the licensing terms with the designer. Many digital product sellers grant commercial use, but you never want to assume. I always verify before listing any product that incorporates a third‑party graphic, even if I’ve digitized it myself. Trust is everything in a craft business.
Practical Embroidery Designer Notes
For my fellow embroiderers who are ready to bring this bunny to life, here’s a quick checklist based on my real‑world testing:
- Test on scrap fabric first — especially if you’re using a new thread brand or a tricky stabilizer.
- Check thread color contrast — the retro palette can look washed out on busy backgrounds; aim for a solid, muted fabric.
- Review stitch density — in the digitizing stage, reduce density on the tiny details to avoid thread buildup.
- Confirm hoop size — the design fits comfortably in a 4×4 hoop when scaled to 3.5–4 inches, but you’ll want a larger hoop for bigger totes.
- Inspect small details — the cap’s cross and the heart need a close eye after the first sew‑out.
- Test in black and white — as I mentioned, it reveals contrast issues fast.
- Use proper stabilizer — I recommend cutaway for sturdy items, tear‑away for light woven fabrics, and no‑show mesh for knits.
- Check licensing — this is a digital embroidery file asset, but you are the digitizer; confirm you can sell the finished product.
Final Thoughts on the Nurse Bunny for Embroidery Projects
The Unique Retro T‑shirt Design, Nurse Bunny isn’t just a pretty graphic. It’s a versatile, emotionally resonant character that translates into embroidery with real grace — provided you give it the digitizing attention it deserves. The retro charm holds up in stitches, the silhouette is easy to work with, and the final product has that “I’d buy this in a boutique” quality. Whether you’re stitching a cozy sweatshirt, a nursery pillow, or a set of custom tea towels, this design offers a timeless, heart‑forward look that customers genuinely respond to.
As a machine embroidery design starting point, the vector files are clean, the shapes are forgiving, and the mood is instantly marketable. I’ll be keeping the Nurse Bunny in my digital library, and I suspect once you stitch it, you’ll do the same.