Skull Smoking: A Designer's Embroidery Review
When I first saw the Skull Smoking design, the mood hit immediately. It is not a soft, playful skull. This one has a quiet, rebellious edge that works well for customers who want something a little darker, a little more rock-and-roll, without going full horror. The smoking detail gives the skull a laid-back, almost vintage biker vibe. As an embroidery designer, I immediately started picturing it on a heavyweight black hoodie, the threads catching the light just enough to make the smoke trail feel alive.
I opened the preview thinking about a real project I had coming up — a custom embroidered tote bag for a client who runs a small alternative apparel brand. She wanted something that could appeal to both men and women, something graphic but not too gory. The Skull Smoking design felt like a strong candidate. The shape is compact enough to sit well on the front pocket area of a sweatshirt or the side of a canvas tote without losing its impact. The smoke curls out to the side, adding a nice sense of movement that breaks up the typical skull symmetry.
First Impressions and Mood
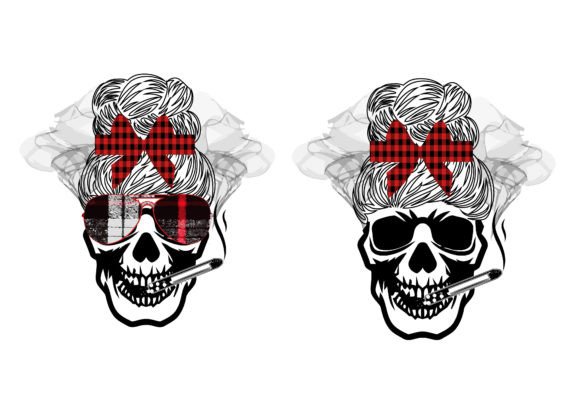
The skull itself is cleanly drawn, with just enough detail in the eye sockets and nasal cavity to read clearly as a skull, but not so much that it would turn into a muddy mess when stitched out. The smoking element — a cigarette or thin cigar tucked between the teeth, with a wispy smoke trail — adds a lot of personality. I can see this design working for a range of products: Halloween-themed merchandise, edgy casual wear, music festival patches, or even bar and pub branded aprons. The mood is rebellious but not aggressive, which makes it surprisingly versatile.
From an embroidery perspective, the level of detail is balanced. The smoke lines are thin, and that is the first thing I would watch closely. Thin, curving lines can be tricky in machine embroidery, especially on textured fabrics like fleece or loosely woven canvas. If the stitch density is not right, the smoke could lose its airy feel and just look like a heavy blob. I would want to test this on a few different fabrics before committing to a full production run.
Where This Design Shines in Embroidery
I can easily imagine the Skull Smoking design stitched onto a black or charcoal gray baseball cap, centered on the front panel. The curved surface of a cap can be unforgiving, but the horizontal flow of the smoke trail actually helps — it pulls the eye across the curve rather than bunching up in the center. On a flat surface like a tote bag or a pillow cover, the design would sit beautifully. I would use a medium-weight cutaway stabilizer on a tote to keep the design crisp, especially around the smoke curl.
For small business owners, this design has strong potential for personalized gifts. A stitched version on a denim jacket back panel would feel custom and high-end, especially if done in a single dark silver or charcoal gray thread to give it a monochromatic, rocker look. You could also play with contrasting thread colors — a deep red for the skull and a smoky gray for the smoke, for example. The design is not overly complex, so it would stitch out relatively quickly, which matters when you are pricing handmade products for craft fairs or Etsy.
Real Project Notes: Stitching on a Sweatshirt
I decided to test the concept on a midweight cotton-blend sweatshirt. I imagined the Skull Smoking design placed on the left chest, about 3.5 inches wide. At that size, the skull details would need to be simplified just a little — the teeth, for instance, might need to be separated enough to avoid thread breaks. The smoke trail, if it contains fine running stitches, could get lost on a textured knit. I would probably digitize the smoke with a narrow satin stitch or a slightly thicker fill stitch to make sure it holds up after washing.
Speaking of washing, that is a big consideration. Sweatshirts get thrown in the laundry frequently. If the design has very fine detail, it could fray or lose its crispness over time. I would always recommend a test wash on a sample piece before selling any finished product. Customer trust is built on quality, and nothing ruins a sale faster than a design that looks great out of the hoop but falls apart after three washes.
Where to Use Caution
There are a few project types where I would be extra careful with the Skull Smoking design. First, thin fabrics like lightweight jerseys or sheer t-shirts. The design, with its solid skull and delicate smoke, could cause puckering if the stabilizer is not right. I would use a no-show mesh stabilizer and possibly a water-soluble topper for a clean finish, but even then, the smoke might not sit as flat as I would like.
Second, very small hoop sizes. If you try to cram this design into a 4x4 inch hoop, the smoke details will likely become too tiny to stitch cleanly. I would aim for a minimum width of 3 inches for the main skull, and that pushes the smoke even further out, so a 5x7 hoop or larger is safer. Always check the actual stitch area before loading the file.
Third, dark fabrics with black thread. While it sounds cool, if the skull and smoke are stitched in black on a black background, the design might disappear. You need enough contrast to make the smoke visible. A dark gray or silver thread on black fabric works much better than pure black on black. I would test the design in a black-and-white mockup to see if the values hold up.
Curved surfaces like the front of a cap can also distort the smoke trail if the design is not properly mapped for cap embroidery. The smoke might bend upward or downward more than intended, so a test stitch on a cap frame is essential.
Small Details That Make or Break the Finish
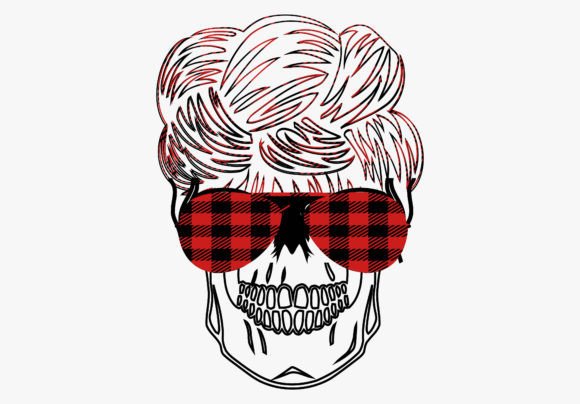
When I look at the Skull Smoking design as a graphic, I notice the smoke has a few thin, wispy ends. Those are beautiful in a digital file, but in embroidery, they can be problematic. I would check the digitizing to see if those ends are at least 1mm wide. Anything thinner might not form a clean stitch. A good digitizer will often add a tiny bit of width to the very tips of the smoke to keep the design sharp.
The skull itself has a nice balance of filled areas and open spaces. The eye sockets and nasal cavity are likely to be negative space, which means the fabric color would show through. That is a great way to add depth without adding extra stitches, but it also means the design's impact depends heavily on the fabric color. On a light gray fabric, the skull might look softer and more subtle. On a bright red or orange, it could take on a whole different personality. I would experiment with three or four thread color palettes to see which one fits the buyer's brand best.
Licensing and Commercial Use
Before you stitch the Skull Smoking design onto products for sale, take a close look at the usage rights. The product description mentions that the seller can design all kinds of t-shirts, but it does not specify whether this particular graphic file comes with a commercial embroidery license. I always recommend reaching out to the seller to confirm that you can use the design on finished items you sell, and whether you can digitize it for machine embroidery. Some graphic files are sold for print-only use, and converting them to embroidery might require an additional license. Clarifying this upfront saves you from legal headaches later.
Practical Designer Notes Before You Start
If I were to add this design to my embroidery library, here is my checklist:
- Test the design on scrap fabric that matches the final product texture — cotton, fleece, denim, or canvas.
- Check thread color contrast against at least three different fabric backgrounds.
- Review the stitch density, especially in the smoke area. Too dense and it will feel stiff; too light and it will look sparse.
- Confirm the hoop size required. The design should fit comfortably in a 5x7 or larger hoop without forcing the smoke into the edges.
- Inspect the smallest details by stitching a sample and pulling it gently to see if any threads pop loose.
- Use a good quality cutaway stabilizer for garments that will be worn and washed often.
- If the file is a graphic, ensure you have the skills and software to digitize it properly, or hire a professional digitizer.
- Always verify the file format before purchasing — some embroidery machines require specific formats like .PES, .DST, or .EXP.
Where This Design Fits in a Craft Business
The Skull Smoking design is a solid addition to a collection of alternative, biker, or halloween-themed embroidery designs. It is not overly seasonal, so you can sell products year-round. I can see it on aprons for a local rock bar, on patches for a motorcycle club event, or on personalized gifts for someone who loves skull art. The design has enough edge to feel authentic, but it is clean enough to appeal to a broad audience.
For Etsy sellers, this design would pair well with "gothic home decor," "skull embroidery pillow," or "custom embroidered denim jacket" listings. The smoking skull motif is recognizable and has a dedicated following. If you present it well — with clear photos of the stitched piece on a quality garment — customers will trust the handmade product. The design itself does not scream "mass produced," which is a huge plus for boutique branding.
In the end, the Skull Smoking design is more than a simple graphic. It is a mood, a statement, and a versatile asset for embroidery projects. With the right fabric, stabilizer, and thread choices, it can become a signature piece in your product line. Just take the time to test it thoroughly, and you will have a finished product that looks professional, feels durable, and makes your customers happy.